> ## Documentation Index
> Fetch the complete documentation index at: https://docs.callcloser.ai/llms.txt
> Use this file to discover all available pages before exploring further.
# Twilio Integration
> A step by step guide to connect to your Twilio account via SIP trunking
## Step 1: Create Elastic SIP Trunking
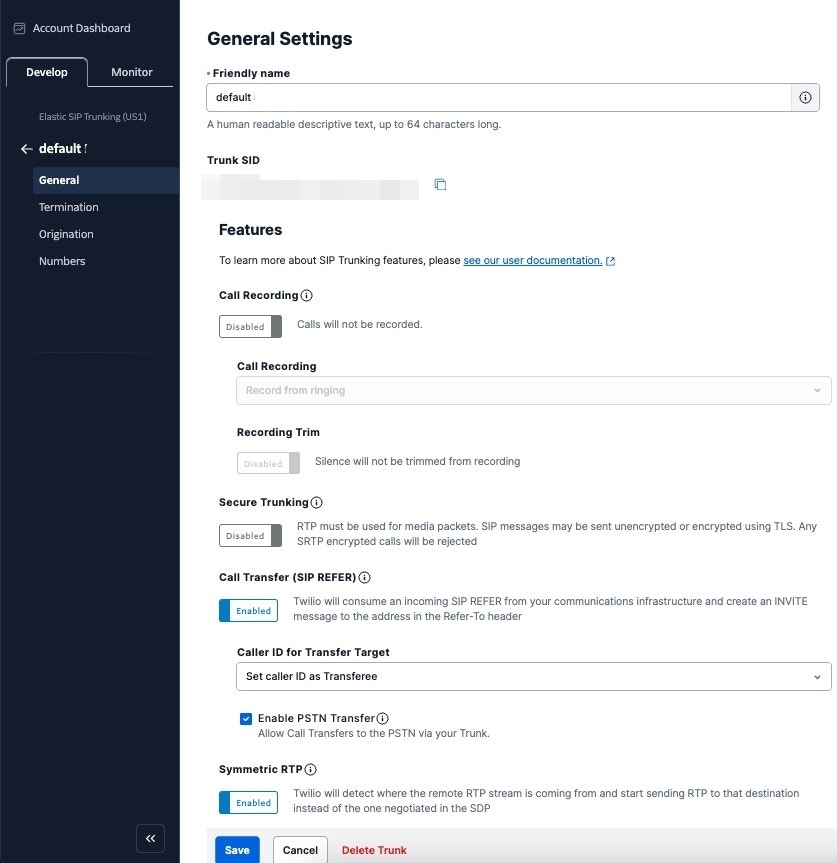
1. Create the trunk, give it a name, and toggle some general settings
 2. Setup termination (this is for outbound)
* the termination SIP URI here is important, we would use it in later steps. You might want to use a localized termination uri that’s near your region. You can expand and view your localized uris in the twilio console.
2. Setup termination (this is for outbound)
* the termination SIP URI here is important, we would use it in later steps. You might want to use a localized termination uri that’s near your region. You can expand and view your localized uris in the twilio console.
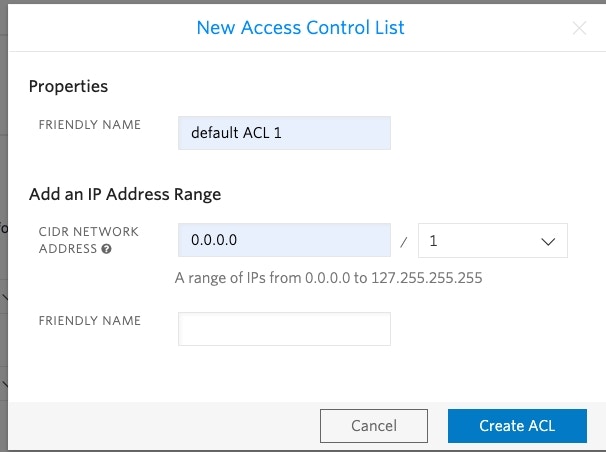
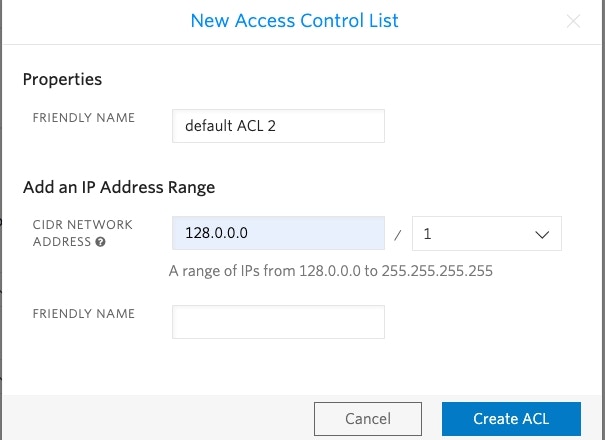
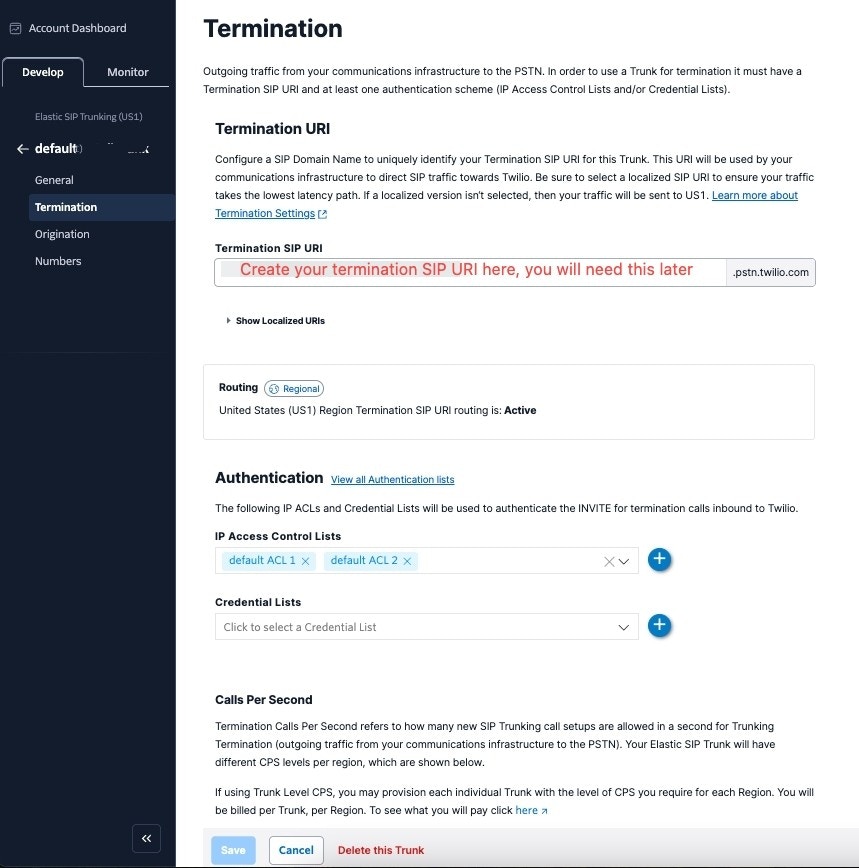 * For your elastic SIP trunk to accept our outbound request, you need to whitelist IP address or create a auth with username and password.
- Currently CallCloser SIP server does not have a static IP, so if you opt for the IP route, you need to whitelist all the IP addresses in the range like following:
* For your elastic SIP trunk to accept our outbound request, you need to whitelist IP address or create a auth with username and password.
- Currently CallCloser SIP server does not have a static IP, so if you opt for the IP route, you need to whitelist all the IP addresses in the range like following:
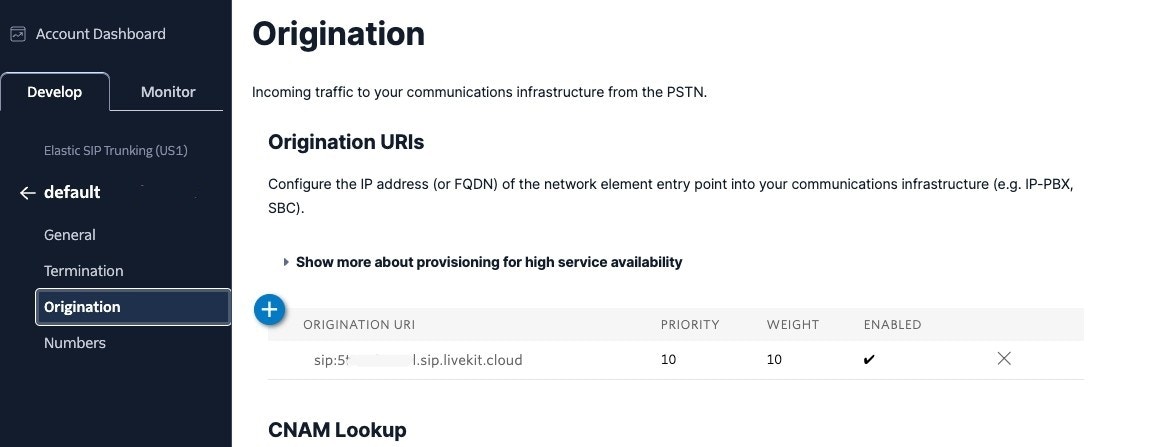
 3. Setup origination (this is for inbound)
* Here you will specify CallCloser SIP server address as the origination SIP URI: `sip:5wed79aeavr.sip.livekit.cloud `
3. Setup origination (this is for inbound)
* Here you will specify CallCloser SIP server address as the origination SIP URI: `sip:5wed79aeavr.sip.livekit.cloud `
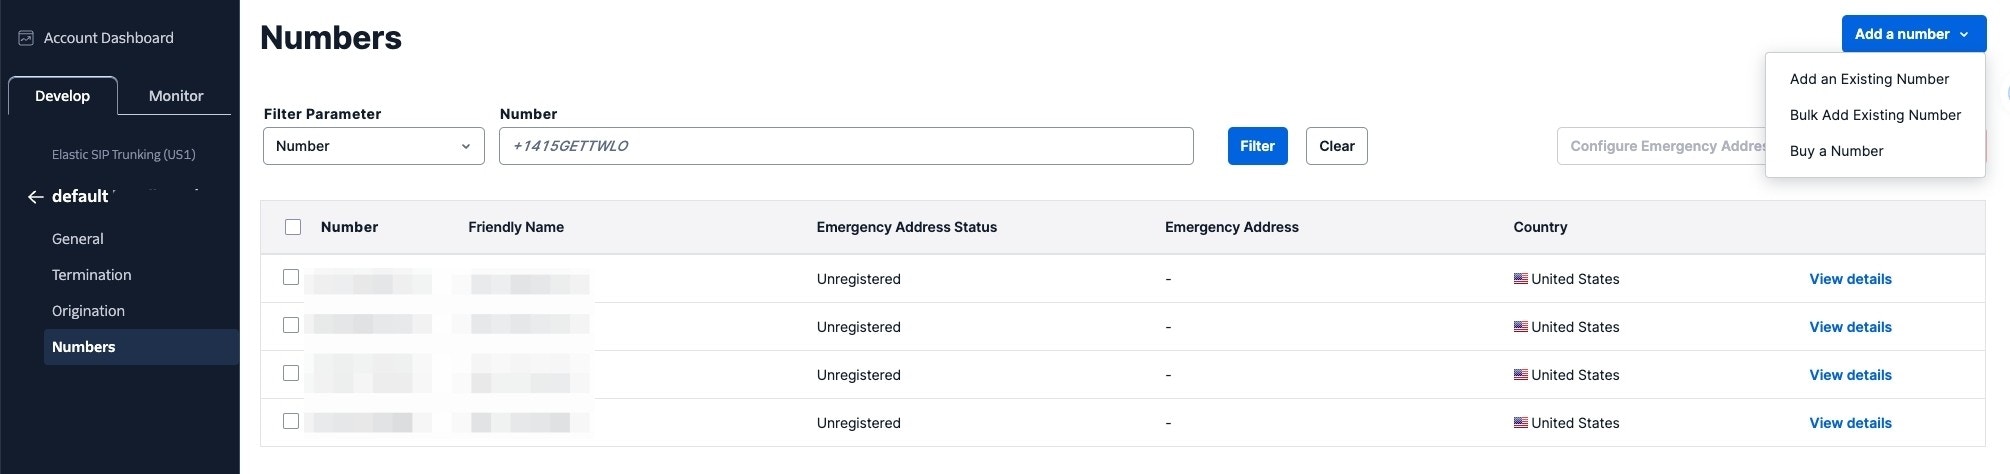
 ## Step 2: Move numbers to Elastic SIP Trunking
You’ve created the elastic SIP trunk, now you would need to purchase numbers / move existing numbers to this trunk.
## Step 2: Move numbers to Elastic SIP Trunking
You’ve created the elastic SIP trunk, now you would need to purchase numbers / move existing numbers to this trunk.
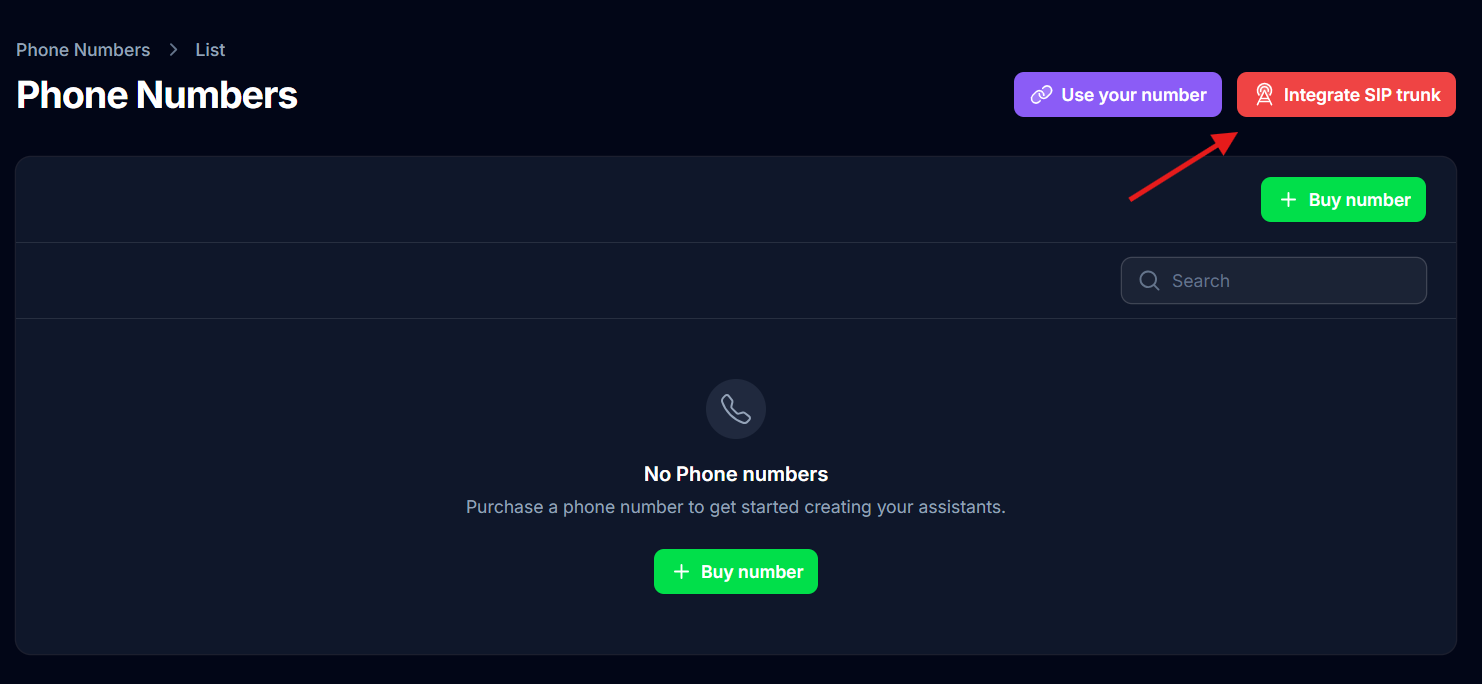
 ## Step 3: Import numbers to CallCloser
Now the number is set up with your elastic SIP trunking, you need to import the number to CallCloser so that we will know how to route the call.
1. Go to your CallCloser.ai dashboard
2. Navigate to \*\* Your Phone Numbers\*\*
3. Click “Integrate SIP trunk”
## Step 3: Import numbers to CallCloser
Now the number is set up with your elastic SIP trunking, you need to import the number to CallCloser so that we will know how to route the call.
1. Go to your CallCloser.ai dashboard
2. Navigate to \*\* Your Phone Numbers\*\*
3. Click “Integrate SIP trunk”
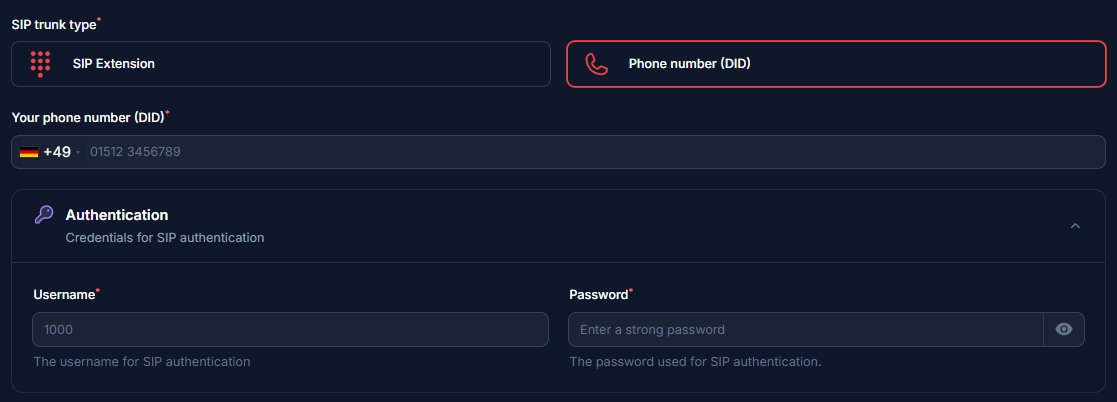
 4. Fill in your details based on your integration type
```
Phone number: e.g., +1 555 0123
Username: Your extension username
Password: Your extension password
```
4. Fill in your details based on your integration type
```
Phone number: e.g., +1 555 0123
Username: Your extension username
Password: Your extension password
```
 5. Here you will supply the termination SIP URI you set up in Step 1.
```
Server address: e.g., xxx.pstn.twillio.com
```
5. Here you will supply the termination SIP URI you set up in Step 1.
```
Server address: e.g., xxx.pstn.twillio.com
```
 6. Here select Authorization type as you opted in step 2.
* If IP type is the option you have selected, add the IPs
```
54.244.51.0
54.244.51.1
54.244.51.2
54.244.51.3
54.172.60.0
54.172.60.1
54.172.60.2
54.172.60.3
```
6. Here select Authorization type as you opted in step 2.
* If IP type is the option you have selected, add the IPs
```
54.244.51.0
54.244.51.1
54.244.51.2
54.244.51.3
54.172.60.0
54.172.60.1
54.172.60.2
54.172.60.3
```
 7. Select the country of where your SIP trunk is located.
 ### Step 4: Verify Setup
After configuration:
1. Make a test call to your number/extension
2. Check that the AI assistant answers
3. Use the test call feature to verify outbound calling
## Security Requirements
Your SIP credentials need to be secure:
* **Username**: Your extension number or provider-supplied username
* **Password must have**:
* 12 or more characters
* Numbers
* Upper and lowercase letters
* Special characters recommended
## Common Issues
* Check your Termination SIP URI If there’s a space in it, please remove. Also you should use a localized termination uri that’s near your region. Check out this [doc](https://www.twilio.com/docs/global-infrastructure/localized-uris/termination) to select one.
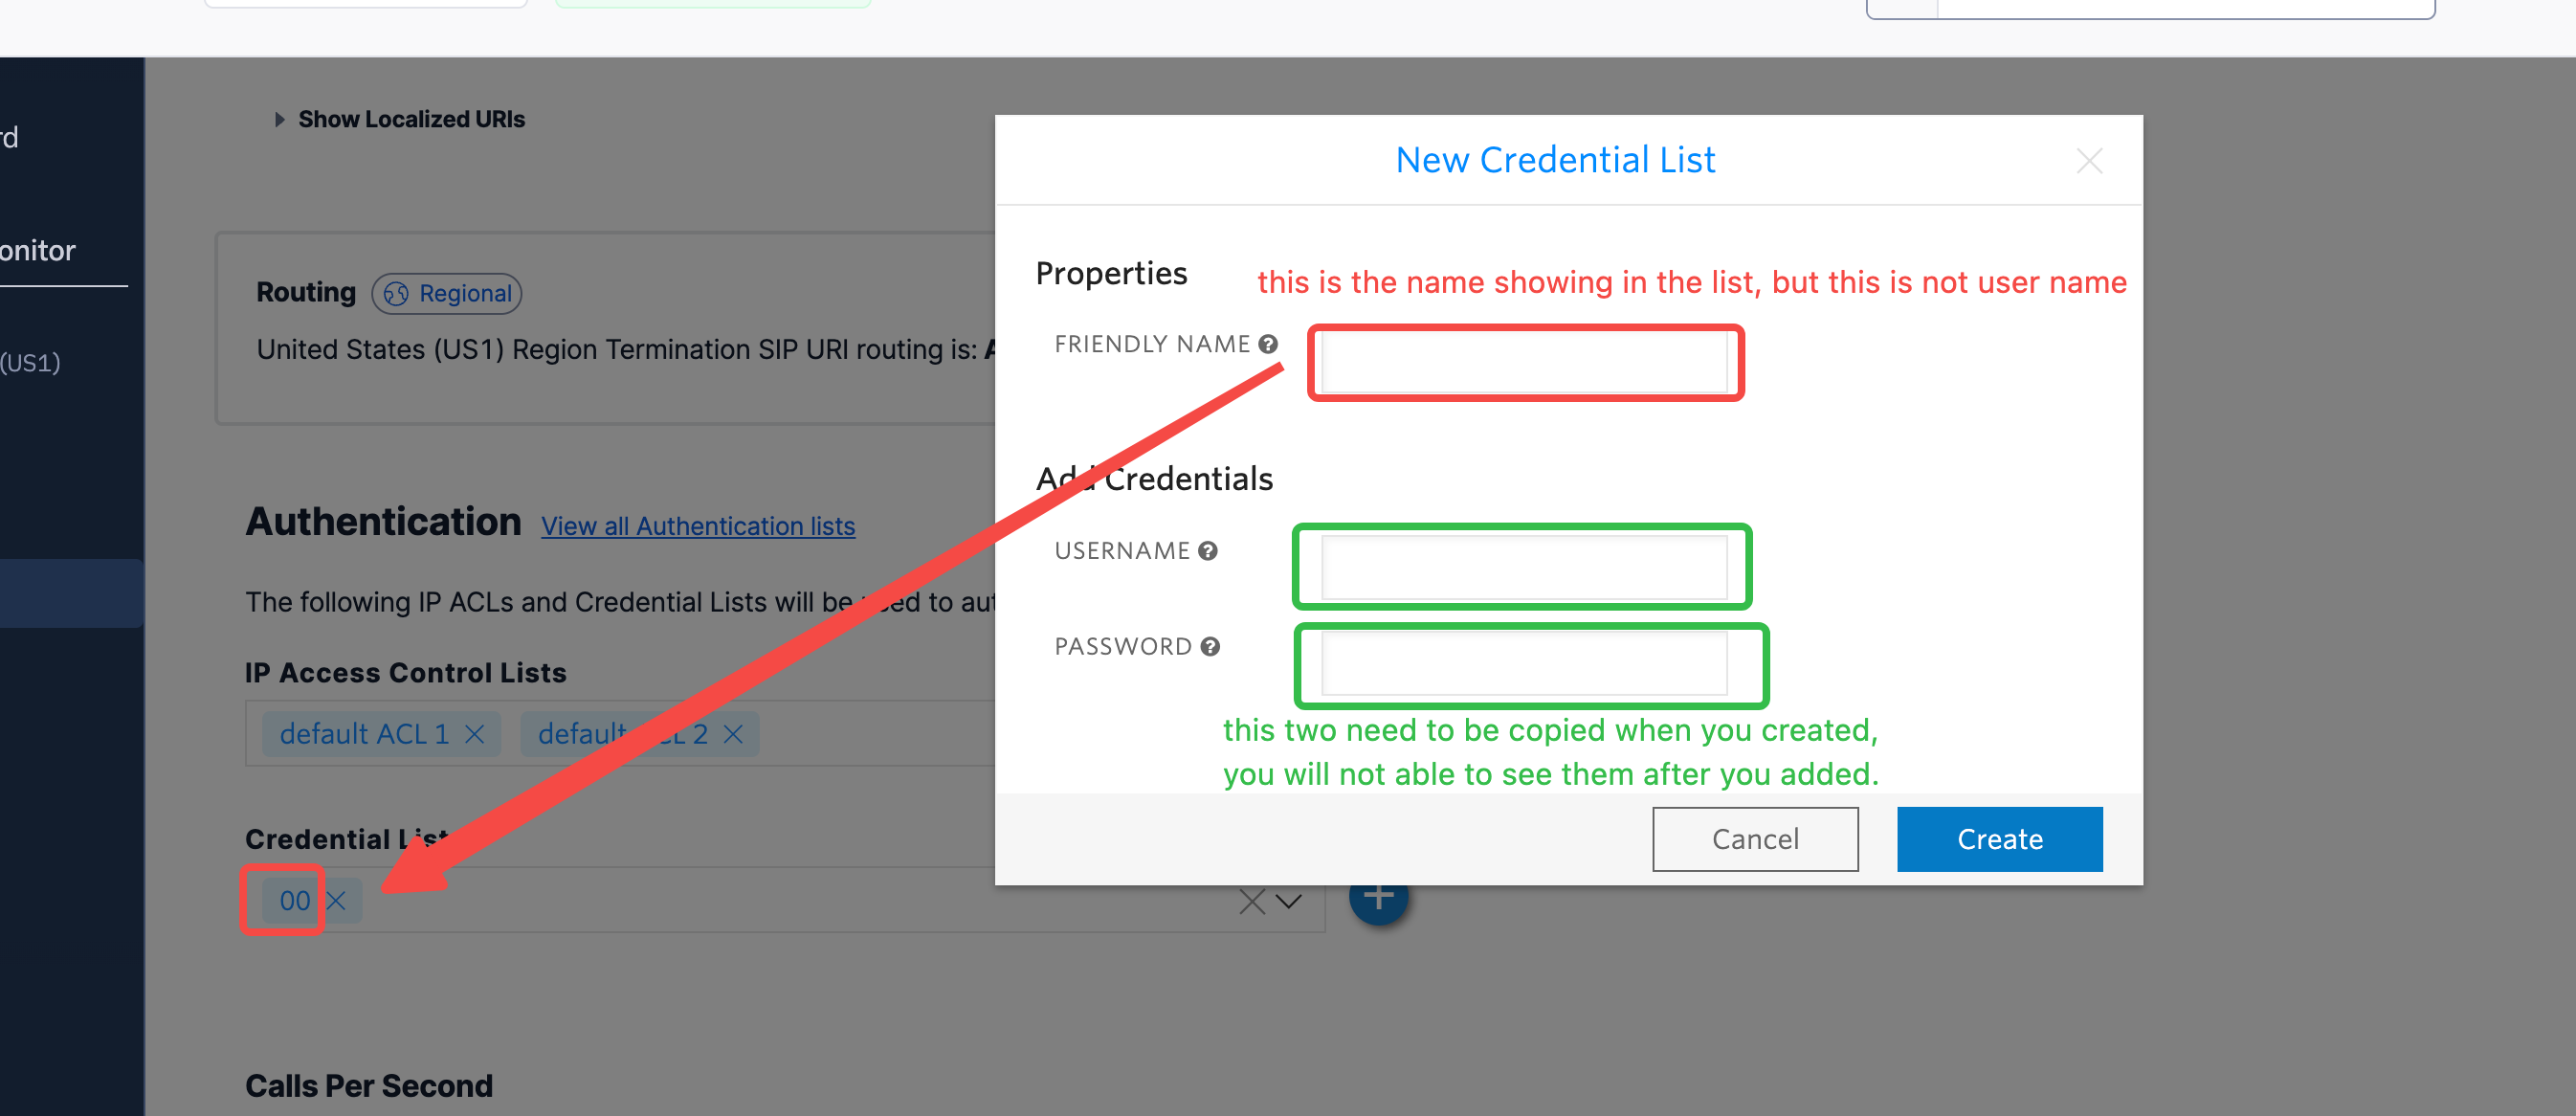
* Check your user name and credentials Please make sure you entered the right user name and credentials which shows in this dialog. Please note the user name is not the friendly name that shows in the credential list. The friendly is different to user name, you need to double check if you happen to give a different name.
### Step 4: Verify Setup
After configuration:
1. Make a test call to your number/extension
2. Check that the AI assistant answers
3. Use the test call feature to verify outbound calling
## Security Requirements
Your SIP credentials need to be secure:
* **Username**: Your extension number or provider-supplied username
* **Password must have**:
* 12 or more characters
* Numbers
* Upper and lowercase letters
* Special characters recommended
## Common Issues
* Check your Termination SIP URI If there’s a space in it, please remove. Also you should use a localized termination uri that’s near your region. Check out this [doc](https://www.twilio.com/docs/global-infrastructure/localized-uris/termination) to select one.
* Check your user name and credentials Please make sure you entered the right user name and credentials which shows in this dialog. Please note the user name is not the friendly name that shows in the credential list. The friendly is different to user name, you need to double check if you happen to give a different name.
 {" "}
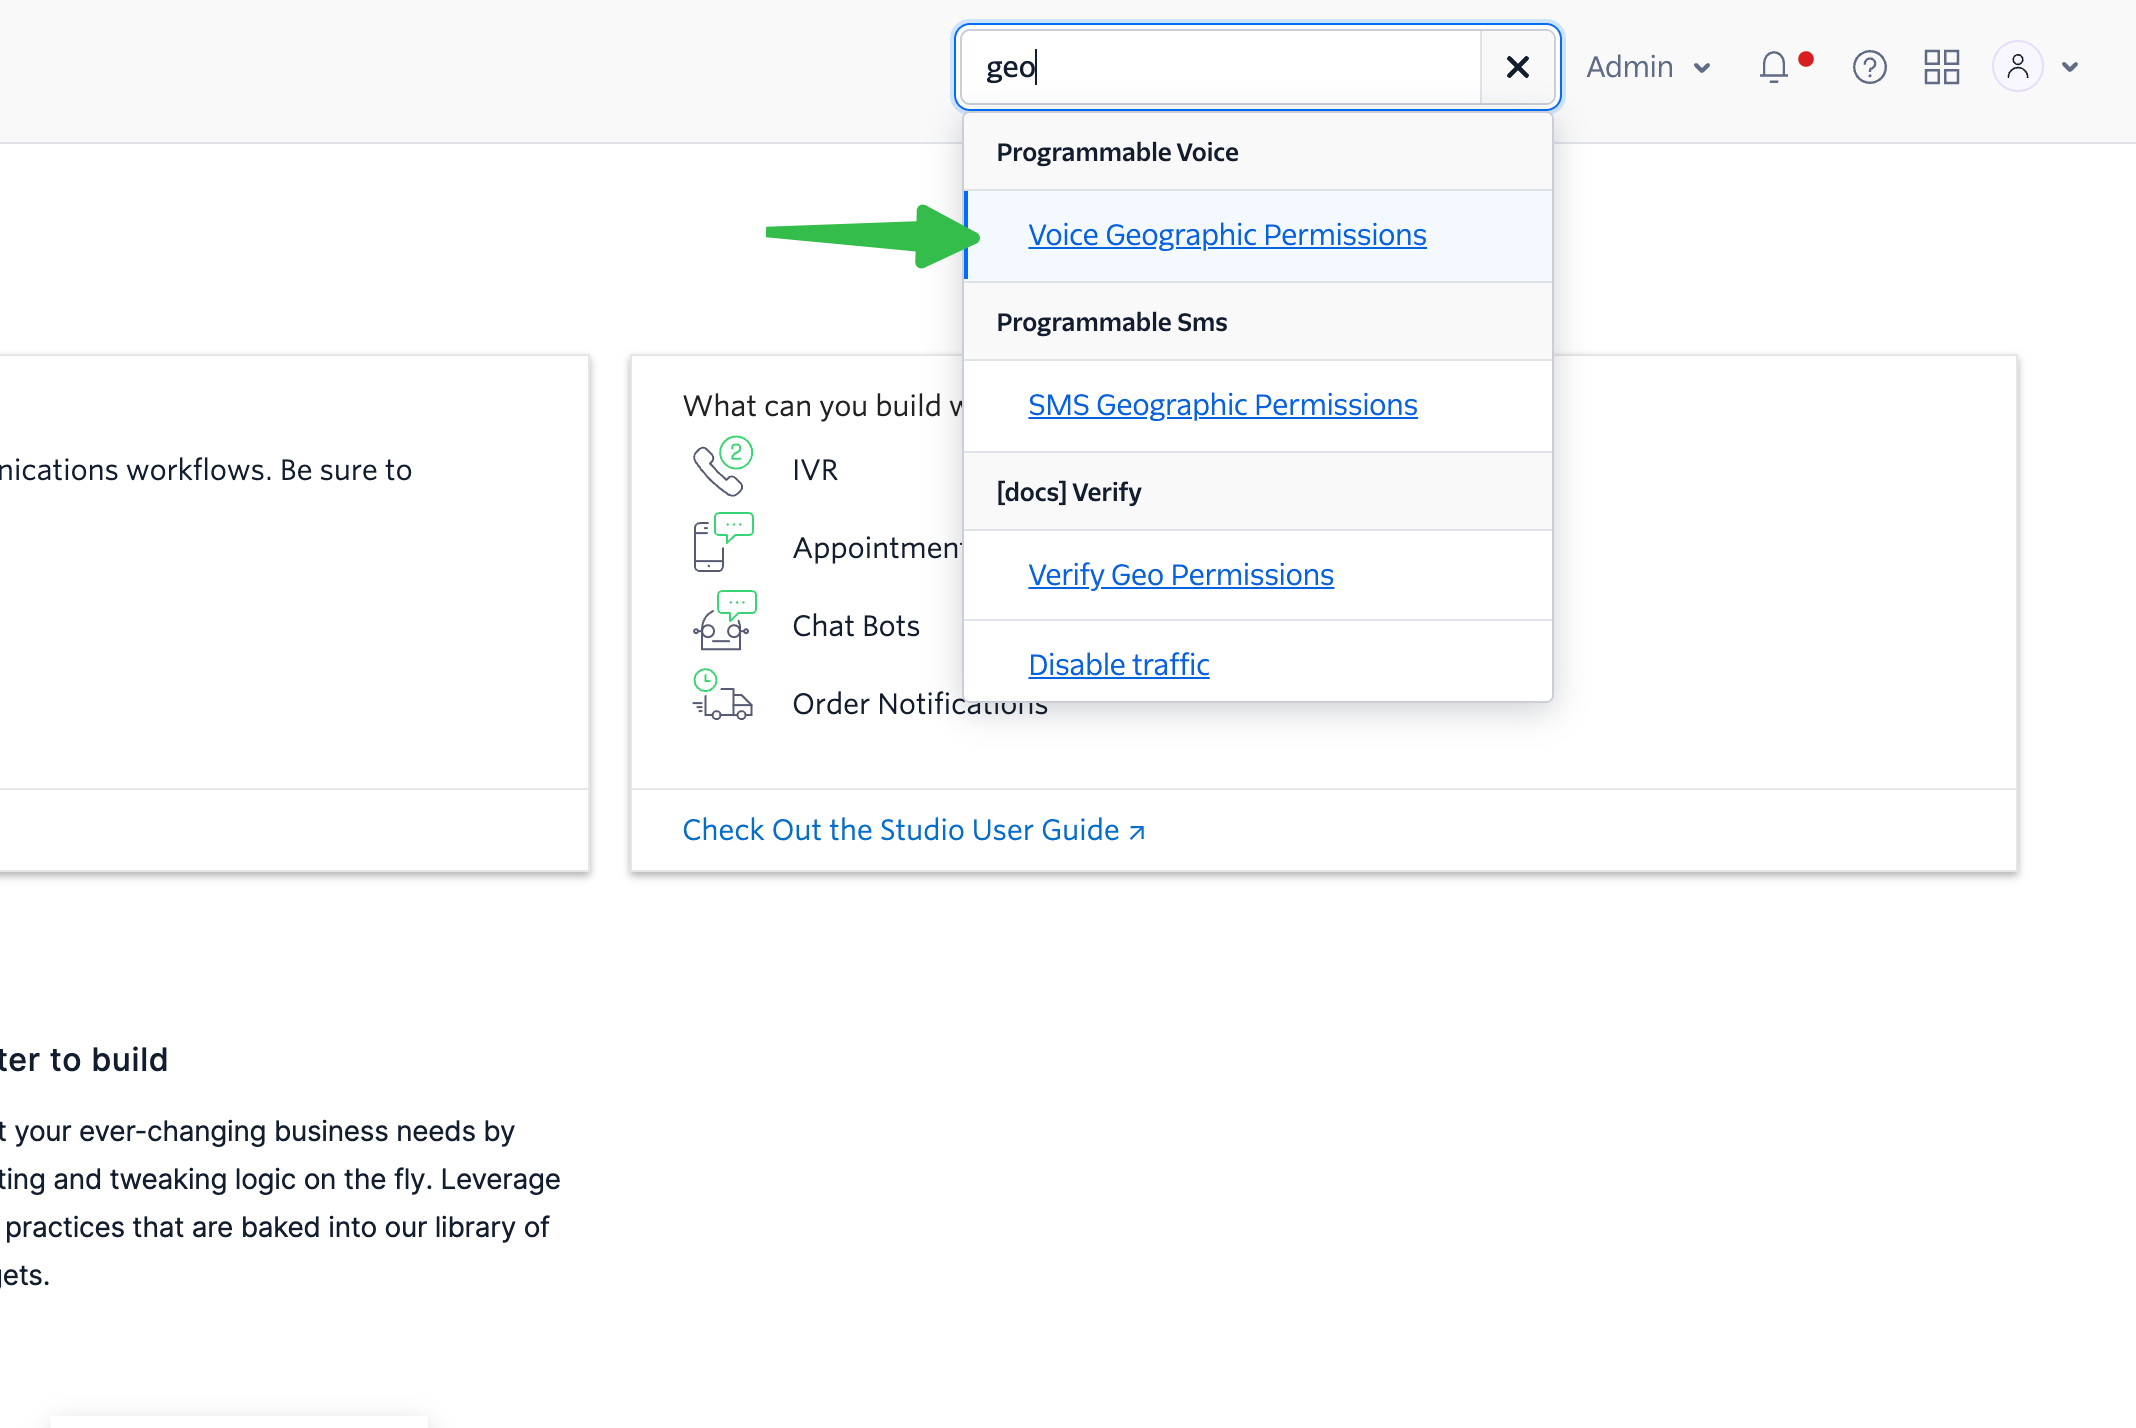
* Search “geo” to find the “Voice Geographic Permissions” setting.
{" "}
* Search “geo” to find the “Voice Geographic Permissions” setting.
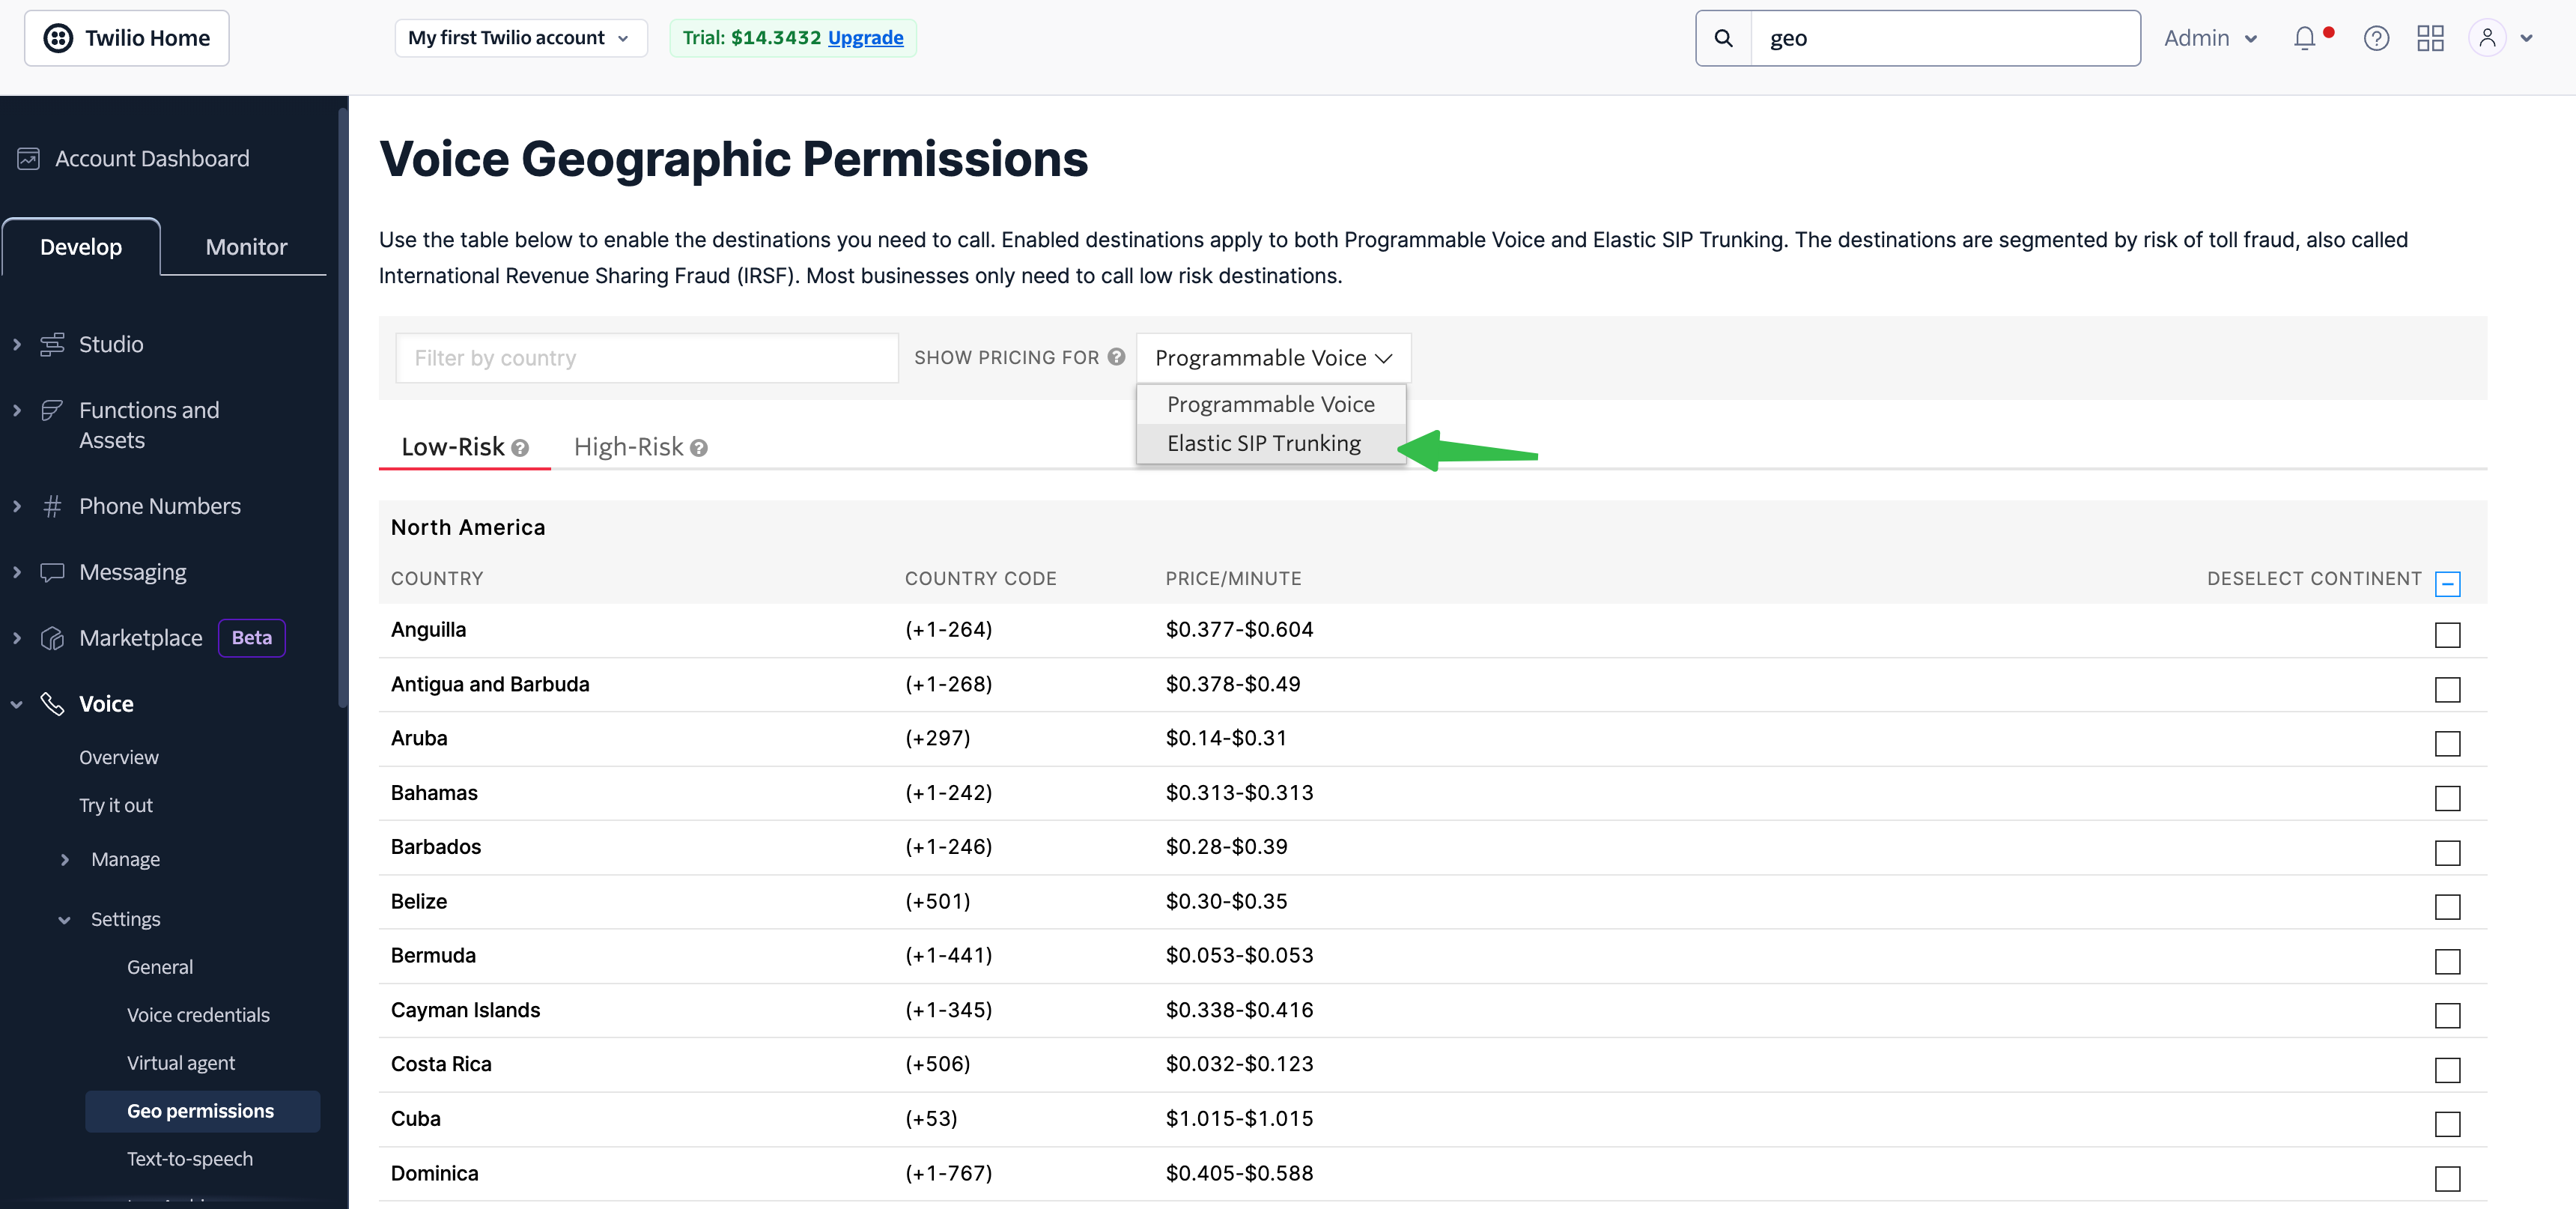
 * Choose “Elastic Sip Trunking” in selector, and select the countries you would like to dial.
 {" "}
***
Need help setting up? Our support team specializes in helping customers
integrate their phone systems. We'll guide you through the entire process,
ensuring a smooth setup with your specific phone system configuration.
{" "}
***
Need help setting up? Our support team specializes in helping customers
integrate their phone systems. We'll guide you through the entire process,
ensuring a smooth setup with your specific phone system configuration.